Portfolio
Facebook
Portrait help – but what do I know? I can’t even get this picture to fit on my blog.
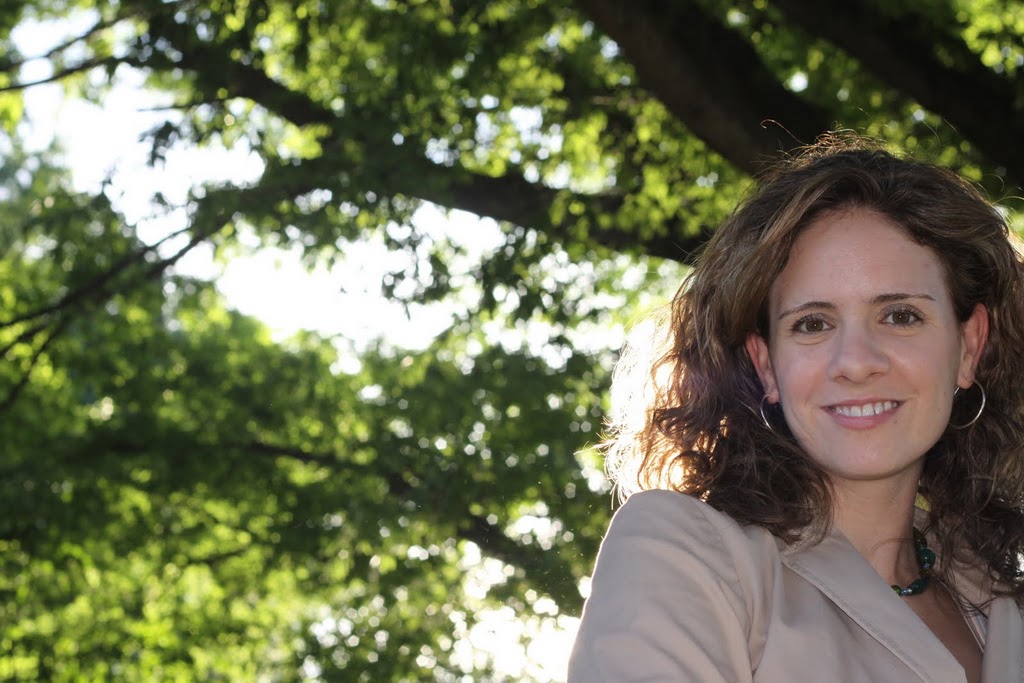
A friend asked me for tips on how to make her portrait photography better. I am learning just like she is, but I thought I would pass on some tips I have learned along the way. Above is an example of a great shot. You did everything right here, and it is a good example of how what I will write below can come together to make a good portrait. Your color is good, your composition is pretty good, you are at a flattering distance from your subject, the sun is behind her, and you used fill flash. Good job. It looks like you tried different things until you got here. I want you to take consistently great portraits without happening upon one. So let’s start with the basics.
Use an appropriate focal length for the distance from your subject
First, portraits are meant to flatter the subject or put her in the best light possible. One of the easiest ways to flatter a subject is by getting far enough away.
You used a 50mm lens on this picture. A 50mm lens on your camera zooms in a little, but not enough to take a picture of someone’s face that close. Try to always stand around 6-15 feet away from a subject no matter how close of a crop you want. Of course this is just a rule of thumb, but generally it makes the most flattering portrait. A close crop like this would probably look best with a 200mm lens zoomed in from 15 feet away. Things that are closer to the camera appear bigger. Everyone’s nose looks large compared to their face when you take a shot this close with a 50 mm lens. A longer lens compresses these features and is more flattering. The closest I would get with a 50mm is a head and shoulders shot. Again rule of thumb.
Composition
Your composition in this and every picture that you showed me is great. Don’t change much. Try to be sure not to cut off hands and feet, and keep the person in the frame unless you are trying to cut her off. Also, the straight on, full face shot is generally not as flattering as a 3/4 shot where the face is slightly turned away from the camera. Most people are accustomed to looking directly at the camera. Models know to turn their faces toward the light and look at the camera. Thinner face = more flattering.
Unless it is the perfect time of day, keep the subject’s face out of the sun – USE FLASH
The sun casts ugly, hard shadows on a person’s face. make sure you either put the person in open shade or turn her so that the sun is not directly on her face.
Here you just wanted her to turn her face a little bit to her left. You then need to expose for her face and blow out the background, or use flash to “fill -in” her face. Of course, you might want the portrait to be moodier and her face in shadows. Looking at her expression, it appears that was not what you wanted here, so you should direct her and get her face out of that sun. Notice the difference between this one and the top photo. You can see her eyes in the top photo and they are in the darkness here. That was your fill flash and conversely the effect of the harsh sun. The sun behind her or to the side of her face can make a really nice back-light or “rim” light, so use the sun to your advantage. An advanced technique is to underexpose the scene and set your flash to expose the scene correctly, but that is outside of the scope of this post. Just notice how the sun and your flash combine on the first picture and not on this one for now.
Now, you don’t always have to use flash. Sometimes the subject has the appropriate lighting falling on her face at the correct angle and the stars align. The rest of the time, when there is sunlight in the picture, a touch of flash makes a little nicer picture. The two situations where I wouldn’t use flash outside, 1) during the “magic hour” when the sun is low in the sky and you have a pretty orange color and everything is perfect (eventually, you will start using flash here too), and 2) in open shade where there is enough light and you are not competing with sunlight (again a lick of flash also looks good here sometimes).
Set your color balance correctly
The above picture could stand to be warmer. Most people struggle with this (what I mean is I struggle with this). First, accurate color is not what people want to look like. Morticia from the Adam’s family will tell you she looks pale if you take her picture with the correct color balance. Most fair skinned people want to look a little warm. This means, if you are shooting JPEG outside, you will likely set your color balance to shade, not sun. Why? Because you are putting the subject in the shade to take her picture. Better yet, set a custom white balance. Check your manual.
Also, the green grass reflects green light on the person’s face when she is in the grass. Remember that. If you take your pictures in RAW, it is less important to get it perfect, but you want to get it close. With RAW, you can set the color temperature and tint later. Saves a lot of hassle.
Share Your Thoughts
Leave a comment to contribute to the discussion
To let us see what you look like, get a gravatar.
Portfolio
Facebook


